Hello! It's Sarah from
Sarah's First Grade Snippets. I hope you are all enjoying your summer break so far! Since most of us are not teaching in classrooms right now, I thought it would be the perfect time to talk about tutoring. Before I had kids, I was tutoring like crazy during the summer! I would literally tutor from 8am to 4pm four days a week. It was before the days of blogging, TPT, and kids so I had the entire summer to myself. Tutoring was the perfect way to get some summer cash and fine-tune my teaching skills in my earlier years of teaching. Now, I don't tutor all day during the summer, but I did start tutoring two kids during the school year at my son's school. It had been a while since I tutored, but it's very similar to what I do for my actual job (reading pull-out.) One big difference was that at my actual job I have a big classroom to store all of my things. When I'm tutoring, I go into another school so I had to haul all of my things with me. That brings back memories of my earlier summer tutoring. I would literally roll in a suitcase full of stuff to the public library and station myself at a table all day. Ha! Well, I've evolved a little. Now I have a cute teacher bag and a binder that go with me and a filing system at home. Earlier in the year, I posted a picture of my tutoring binder on Instagram. I had some requests to see more, but just never got around to it. I thought I'd share some of my tutoring tips today. :)

Don't lug around a suitcase like I did early on! Unless you tutor in your classroom, you will need to be prepared and organized. My tutoring sessions usually last between 30 and 45 minutes so I need to make sure I have engaging and meaningful activities to fill that time. Keeping this stuff organized is key for your own sanity! Also if you are totally organized, it makes your tutoring session flow much more smoothly.
This year, I carried a teacher bag with this binder. I had a separate filing system at home filled with more tutoring stuff. Everything I need for that day is in my binder.
I use these divider pockets to separate parts of the lesson.I like the ones with pockets because I always have things to fill them with! The picture above shows the different tabs I use for my binder. For each session, I do a phonics lesson, sight word practice, a fluency exercise, and guided reading. At the end of my binder there are tabs for lesson plans, notes, and assessments.
Since you may be tutoring in a room with no materials besides a pencil waiting there for you, you should definitely come prepared with your own pouch of goodies. Above is a picture of what I have in mine.
You can create your own word building mat and tiles. You can cut index cards into smaller rectangles for the letter tiles and use a regular piece of paper to draw a word building mat.
I have two phonics tabs in my binder. One is for introducing the phonics skill (the building words) and the other is for addition practice. I usually have 2-3 more activities to follow up my introduction. These are less guided and more for the student to practice sounding out words using that phonics rule. Some simple activities include word sorting and matching up onset and rime. There are all sorts of resources on TPT for this!
When you are planning your sight words, there are a few more tips:
1. Get a list (dolch, fry, or a list your district uses)
2. Find out what words your student already knows (this means they read them instantly on sight)
3. Keep a checklist of which words you taught and which they mastered.
4. Introduce 3-5 at a time, depending on where they are at. Don't try to throw a bunch of new words at them. To make them stick, your student needs to practice them over and over in different ways. For your beginning readers, you may only want to introduce two at a time.
5. Review previously learned sight words. This is good for two reasons: It's good to review so they go deeper into their stored memory and it helps with confidence/flow when you are playing a sight word game. Have a stack of notecards with the words that you have worked on, plus some that they already knew. Begin by going through this stack.
6. For your new words, add a multi-sensory experience by tracing the word in glue. You can add glitter or just keep the glue. Then let your student trace and feel the word. You could also use Wikki sticks and pipe cleaners to make the word. That way, your students can feel the word and build the word in a different way. These materials are also easy to carry around. :)
There are so many awesome ideas on TPT for practicing sight words!
Here is a simple activity to add to your toolkit:
This is an activity that you can make on your own using a file folder. Games are fun, but your student does need to be seeing the word, tracing the word, and writing the word. This activity is perfect for that.
Your plan doesn't have to be super detailed. I just think about two main things: what am I teaching and how am I teaching it. In this picture below, you see the what under the skill. The how is under the method.
Here is an example of what you could use if you are tutoring more than one person in a day. I used something like this in my earlier years and it helped me stay organized with all those kids! In the boxes, you can include the what and the how together.
I plan it out first, then I "pack" my binder with the things I'll need.
This is honestly the best investment! I first bought a subscription my first year of teaching and I was so happy I did. It's SO worth it! Look at all these options:
Once you've assessed your student, you are ready to plan your instruction!
I'm constantly changing the way I assess and keep notes from year to year in my own classroom. It's a problem. Don't be like me. Choose a way and stick with it! Here are some ways that I keep track of my students' sessions and assessments.
The top left is used when the student is reading a book or reading passage. I do a quick check using this page. The checkmarks under the running record column show a snapshot of their reading for that day. Then I go back and "grade" their fluency, comprehension, use of phonics skills, and sight word knowledge with a simple plus, check or minus.
The Snapshot Assessment is what I fill out at the end of the session. It includes all the pieces of the session. I "grade" with a scale of 1-4. This helps me keep track of their progress.
The Phonics Snapshot is used specifically to keep track of phonetic skills. It goes into more detail (can they blend, can they segment, are they fluent with reading those phonetic words.) I mainly use this with my beginning readers. The last picture is my phonics quick check form. For time sake, I might only check half of it in one session and half in another. I use that when I think a child is ready to move on to the next skill. You certainly do not have to be this detailed! Choose one that works for you and go with it! :) It could be as simple as a box to take notes!


One mistake I made super early on was that I spend too much time having my student read a book. Although it's important to practice reading real books, they can do that with their parents. They can do that on their own. We need to provide them with
instruction and
guided practice. Our struggling readers see a book as a daunting task. It's big, filled with too many words. Sigh. I find it really helps to give students opportunities to read in smaller parts. If you are working on fluency, they need to have opportunities to reread things. It makes sense that those texts need to be short so you have the time to reread them. I use short reading passages or story cards (in my
Super Reader pack or any seasonal guided reading pack.) Whatever you choose to use, make sure it is an appropriate level and not too long. Choose one focus each day: expression, rate, stopping at punctuation, etc. Model it first and again after they read so they can hear good fluency.


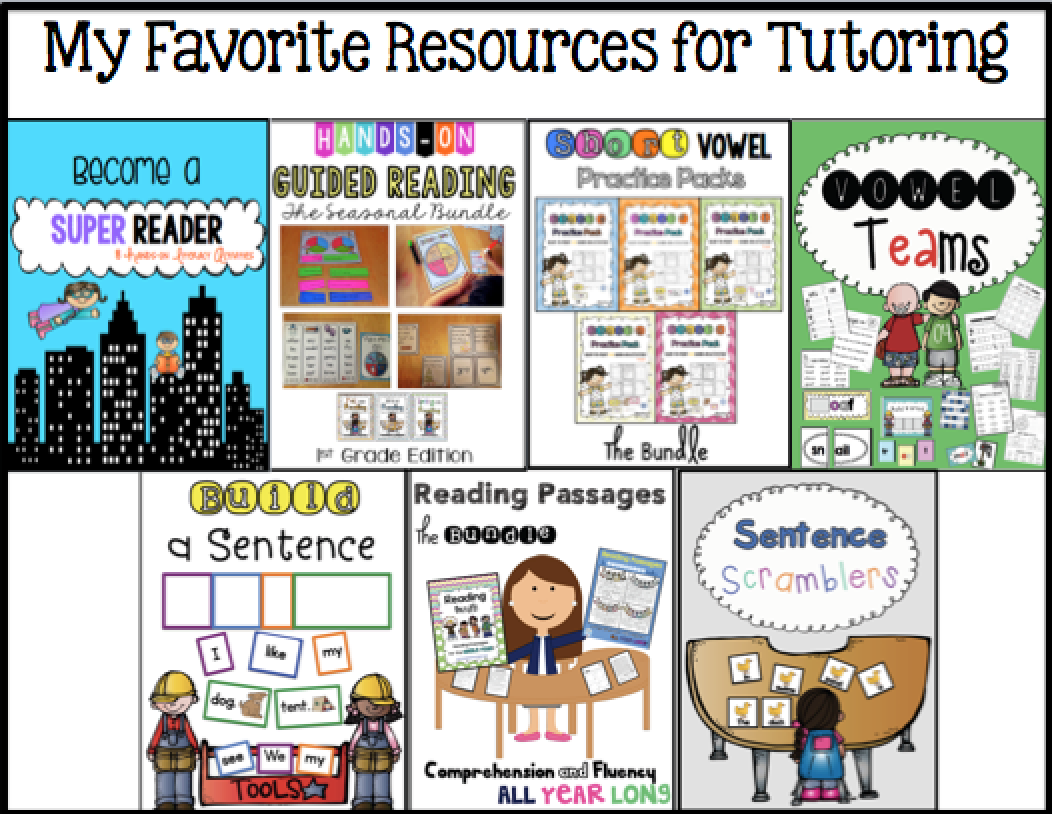
When I'm tutoring, I often pull from these resources:
Sentence Scrambler:
Head on over to my blog if you want to read more about my Tutoring Toolkit.
Don't forget we have TONS of great posts in store for you this month. You can read more about it, by clicking
here.